The LinkWithin widget that is placed at the end of a blog post is such an asset! An easy widget to install, it will automatically generate thumbnails from your blog archive to link to related posts, to draw your visitors attention and keep them engaged.
The
tutorial on how to install LinkWithin widget on your Blogger blog as shared in my previous post is perfect for normal standardized posts in full display, without the Read More text link
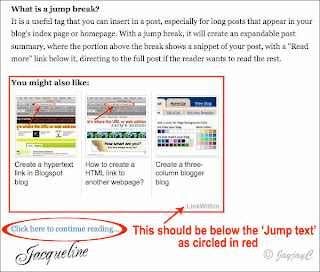
But, if you're applying the
'Read More' feature for your posts in Blogger, then the LinkWithin widget will cause the Read More link that was created by the Jump Break to be shifted below it as seen in the left image. I find this inappropriate as the Read More link should be positioned just below the snippet instead.
Some bloggers even prefer that the LinkWithin thumbnails be shown under the post only after clicking the Read More link and not under the post summary in the home page. And, they have found a way to change that -
learn at Blogger Buster on how-to remove them if you're in the same boat. I really don't mind as I find the thumbnails rather appealing, adding extra visibility and giving more options to readers!
My problem though, as indicated earlier was, the LinkWithin thumbnails should appear below the Jump Text and not above it. So, I decided to check from LinkWithin site itself and was delighted to have found a clue at
LinkWithin FAQ page that included this Q&A below:
4. How can I customize the placement of the widget on my blog?
Modify your HTML template to add the code below at the place where you want the widget to appear:
<div class="linkwithin_div"></div>
Humph, that was all it showed...nothing more! What about how to apply that? Not helpful to a technically challenge person like me, huh!

 RSS
RSS Email
Email
 "
"